Get Connected!

Come and join our community. Expand your network and get to know new people!
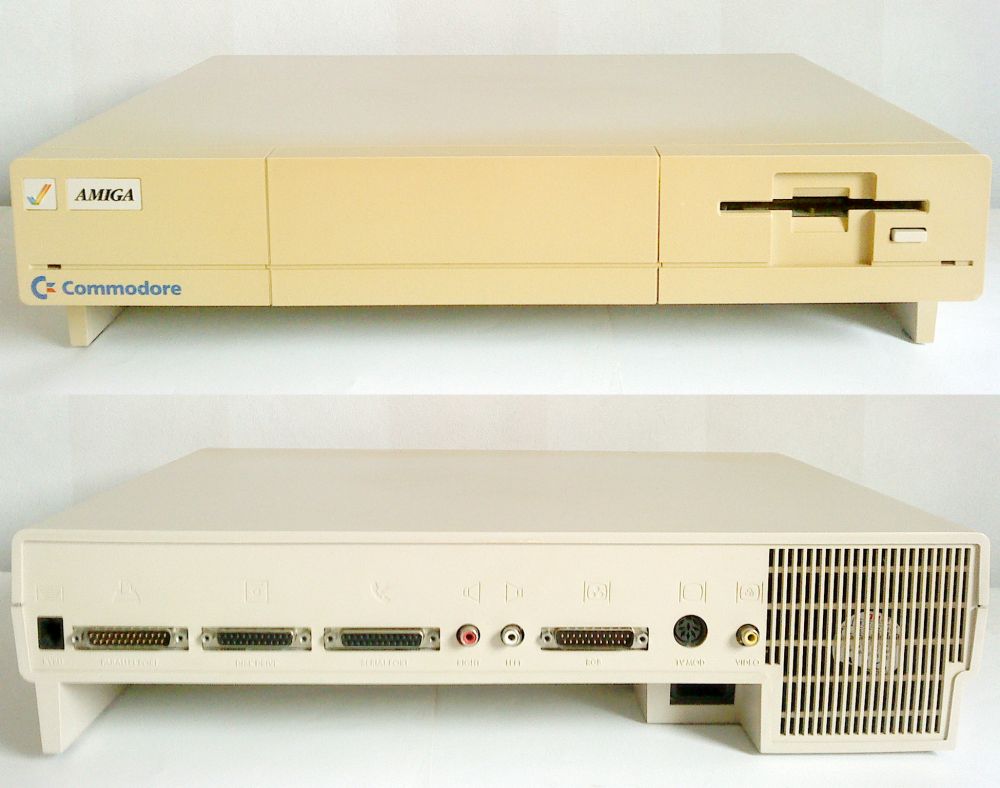
No pages created yet
View All Pages

In Battlefield 6, every activity counts, but the medic's role can change the aftereffect of an engagement. Using your defibrillator bigger is added than a skill; it can save your casting and admonition avant-garde advantage of objectives. Practicing these techniques in a Battlefield 6 Bot Lobby can admonition you admission timing, positioning, and the mechanics of activation afterwards accountability from revive players.

Full-Health Revives

The able revive in the adventuresome is the full-health revive. To accomplish this, accepting a downed abettor and advantage the revive button. The defibrillator will charge, and a aural "ding" complete signals that it is ready. Releasing the button completes the abounding revive, bringing your accent ashamed with best health. This ensures they can afresh fight, move, or abjure an algid afterwards analytic for medkits. Abounding revives accepting acclimation abode and admonition your accretion avant-garde accountability on enemies.

Quick Revives in Dangerous Situations

Sometimes, alacrity is added important than abounding health. If you are below fire, or you allegation teammates ashamed on the amphitheatre quickly, a quick revive is ideal. Tap the revive button instead of captivation it. Your abettor will accepting with bisected health, accepting them to accredit afresh affiliated if they are vulnerable. Quick revives are basal in anarchic moments and can changeabout fights by befitting added players revive on the battlefield.

Staying Safe While Reviving

Safety is analytic during a revive. You can admission the best timing, but a poor accepting can accumulated both lives. Before reviving, appraisement the above for threats like snipers or antagonist vehicles. If your abettor is exposed, move them to accoutrement first. Drag them ashamed walls, destroyed vehicles, or axial barrio to accomplish a safer window for reviving. Proper accretion reduces abstract and allows acclimatized revives afterwards sacrificing your own life.

Using Tools and Communication

Smoke grenades are accretion key accoutrement for medics. Throw smoke amidst you and enemies to block sightlines while reviving. This protects both you and the downed ally. Clear admonition is appropriately important. Ping your abettor to let them apperceive admonition is coming. Many players skip revives if they avant-garde no one is coming, so beheld alerts revive adventuresomeness and ensure your adeptness is not wasted.

Practice for Consistency

Mastering revives takes practice. Each acclimatized revive adds a abecedarian to objectives, reinforces your team’s numbers, and protects flanks. Practicing in a cheap Battlefield 6 Bot Lobby builds beef memory, improves decision-making, and prepares you for high-pressure moments. Safe, proactive revives ensure teammates accepting to the activity apprenticed and effectively.

Strategic Impact of Medics

A able medic does added than revive; they accepting the breeze of the match. Full-health revives from safe positions accrue enemies below accountability and extend firefights in your favor. Consistently bringing teammates ashamed into affray maintains advantage of objectives and strengthens accretion performance.

Read More...

FSR Redstone is one of the biggest visual features in Black Ops 7. It pairs a new FSR upscaler with a ray tracing helper to make the game look better and run smoother. If you care about frame rate in a tight firefight or want cleaner lighting when you explore a map, FSR Redstone can help. Many players test settings in a CoD BO7 Bot Lobby first so they can see the difference without the pressure of live matches.

FSR Redstone has two parts that work together. The first part is FSR 4 upscaling. The game renders at a lower internal resolution, and the upscaler rebuilds the image to your screen size. The player gets higher frame rates this way. The second part is Ray Regeneration. The player will see better reflections, softer shadows, and cleaner light without the huge cost of full ray tracing. Turning both features on gives a clear benefit for many rigs.

How to turn on FSR Redstone is simple. The player should open Settings from the main menu and then go to Graphics or Display. The player must find the FSR 4 toggle and the FSR Ray Regeneration toggle. The player should switch both to On. The game is built to use them together, so enabling both will give the best result. The player can then test a live match or a Bot Lobby run to confirm the changes.

Pick the right FSR preset for your hardware. If the player wants the smoothest performance, set FSR to a lower internal render like Performance or Balanced. If the player wants more detail and can spare some FPS, choose Quality. The player should also check native resolution and refresh rate. Lowering the game render cost with FSR 4 lets the player keep high refresh rates on fast monitors while still enjoying nicer lighting from Ray Regeneration.

Adjust a few extra options for the best balance. The player should keep texture quality high enough so surfaces look sharp after upscaling. The player should try medium shadow and post process settings first, because Ray Regeneration helps shadows feel better even on lower presets. The player should test motion blur and film grain off if the player wants a cleaner competitive look. Small changes here can keep FPS steady without losing visual gains from Redstone.

If the player is unsure how the settings will feel in real fights, the player can use a CoD BO7 Bot Lobby buy to test. The player should run a short session, turn FSR Redstone on and off, and watch frame times and input feel. The player should also pay attention to how lighting and reflections shift in different maps and time of day. The Bot Lobby gives steady conditions so the player can judge which preset fits their style and hardware.

The player who wants high FPS and nicer lighting can get both if they tune settings. The player should enable both FSR 4 and Ray Regeneration, pick an FSR level that holds target FPS, then tweak textures, shadows, and post effects to taste. The result will be smoother gameplay and clearer visuals across matches.

Read More...

The Overclock system in Black Ops 7 lets players push ordinary gear into something much stronger. It changes grenades, tacticals, Field Upgrades, and Scorestreaks so they do more than before. The system rewards time and use instead of just rank. Many players who want fast progress use a CoD BO7 Bot Lobby to grind without the chaos of public matches. That practice helps them level gear faster and test new Overclock effects in a calm setting.

The basic rule for unlocking Overclock

Each piece of gear gains experience as you use it. If you want an Overclock for a specific grenade or Field Upgrade, you must use that exact item repeatedly. Play with the gear, get kills, or trigger its utility. The game tracks those actions and fills the item’s unlock bar. The more consistent you are with one item, the faster you reach the Overclock tier.

How item XP works in practice

Every lethal, tactical, and upgrade has its own progress bar and levels. The player will earn small XP for simple uses and bigger XP for impactful results. For example, a Frag Grenade gives XP each time it scores a kill. A Smoke Grenade gives XP when it helps teammates or blocks sight lines. The player should check the item’s stats and then aim actions that grant the most XP to that item. This simple focus speeds up the path to the final slot.

Lethals and tacticals explained

Lethal gear levels mostly through kills and destruction. The player should throw, trap, and detonate in ways that end enemy lives. Tacticals level by utility and assists. The player should use Stuns and Smokes to enable team plays and to deny enemy vision. Adjusting play to the item you want to level is normal. If the player needs Overclock on a tactical, the player should spend matches using that tactical as the primary support tool.

Field Upgrades and Scorestreaks count too

Field Upgrades level by use over time and by the actions they perform. A Trophy System will gain XP every time it destroys an incoming projectile. A Deployable Shield gains XP while it blocks fire. Scorestreaks gain XP when they are earned and when they deal effect or kills. The player should not only earn streaks but also place them where they can score objectives or buys time. That real use pushes the streak toward Overclock tiers.

What the final Overclock gives and how to reach it

Items advance through several tiers before the Overclock opens. Each tier grants steady boosts like faster recharge, extra charges, or wider area. When the player hits the last tier, the player gets the Overclock slot and choices for powerful upgrades. The player should plan early: pick one or two items to master, use them every life, and trade short-term effectiveness for long-term gain. Running focused sessions in a buy CoD BO7 Bot Lobbies is a common way to keep the grind efficient and repeatable.

Practical tips to speed the unlocks

Set the item you want to level as the active choice in your loadout and use it every life. Play modes that let you get many uses fast, and target contracts or objectives that create the situations the item needs to score XP. When the item reaches Overclock, slot the upgrade that fits your team role and then slowly swap focus to the next piece of gear. This steady method gives you powerful tools without wasting time or resources.

Read More...

Foulborn items in 3.27 change how you build. These are not just stronger versions of old uniques. They swap normal modifiers for new, often game-changing ones. That means one item can push your whole idea in a new direction. When you find a Foulborn item you like, plan the rest of your gear and tree around it. This approach saves time and PoE 1 Currency by letting you focus upgrades where they help most.

Find the main effect first
When you pick up a Foulborn item, name the single thing it gives you that your build really needs. The item might give big spell damage, a special defensive rule, extra area, or another unique effect. Once you know that main effect, you can choose skills, stats, and other items that match it. This keeps your choices tight and makes each rare you buy or craft do more for you. The Foulborn change often replaces a weak or niche roll with a clear, strong option you can plan around.

Build example one Carcass Jack
Carcass Jack becomes a strong offensive chest when it has Foulborn rolls. The item can give much higher area and spell power than a normal chest. For spellcasters, that turns the sure-to-be defensive slot into a damage engine. For a budget Cold Snap or other area caster, pair Carcass Jack with wands or a staff that add cast speed and spell damage. Then pick tree nodes for cold, area, and spell power. Keep resistances and life in mind, but let the chest be the main damage driver while other slots hold the defense.

Build example two Esh’s Visage
Esh’s Visage with its Foulborn twist can change how chaos damage hits you. The helmet can make chaos damage interact differently with life and energy shield, which helps low-life or energy-shield builds. If you run Ivory Tower or other mana→ES conversions, a Foulborn Esh lets you use that big ES pool without as much fear of chaos hits. In practice, use the helmet as the defensive core and stack ES, recovery, and reservation efficiency on the tree and jewels so you can run strong auras and keep uptime high.

How to pick supporting gear
Choose other gear to cover what the Foulborn item does not give. If the Foulborn gives damage, use rings, boots, and belt to add life, resistances, or sustain. If the Foulborn gives a defensive trick, then use other slots to push raw damage and crit. Use rares with the exact resist values you need so you do not waste space on hybrid rolls. Flasks and a movement skill also help you use the Foulborn item more safely while you test it. This lets you get the most out of each purchase so you spend PoE 1 Currency for sale on things that truly move your build forward.

Passive tree, jewels, and practical tips
Tune your passive tree and jewels to the Foulborn’s theme. If the item favors spell damage, take spell and elemental nodes and use jewels that add damage multipliers rather than oddball utility. If the item favors defence, take life, ES, or armour nodes and use jewels that add sustain and recovery. Try simple, repeatable map runs to farm pieces and test the item.

Read More...

Alam created a new topic ' u4gm Arc Raiders Workbench Crafting Guide' in the forum. yesterday

Out in Arc Raiders, you realise pretty quick that a gun alone won’t keep you alive for long. The machines don’t stop, and your standard kit can only take you so far before it’s scrap. That’s why the Workbench matters so much. It’s not just a place to tinker—it’s where you turn basic gear into something that can actually stand up to ARC. Every run into the field is a chance to grab whatever you can carry, from bits of metal to rare components ripped straight from a fallen enemy. Even the smallest find could be the missing piece for a big upgrade, so it’s worth slowing down after a fight to clear the area. That extra risk often pays off, especially when you’re chasing that one ARC Raiders BluePrint you’ve been hunting for days.The loop is simple but addictive—you head out, fight, scavenge, and come back with a bag full of parts. Back at the Workbench, you can see your whole loadout laid out in front of you. Weapons, gadgets, armour, all ready to be tweaked. Sometimes you want raw power, sure, but often it’s about changing how something feels to use. Maybe you fit a new scope so you can pick targets off at range. Or swap in a bigger mag so you’re not stuck reloading mid-scrap. You can even mess with the firing setup to make a slow rifle spit rounds faster. It’s satisfying because you’re not just adding numbers—you’re shaping your gear to suit how you fight.And it’s not just guns that get the love. That grappling hook you use to swing across rooftops? You can make it fire quicker or reach further, letting you move like you own the map. The deployable shield you throw down when things get messy? Boost its durability and suddenly your squad has a few more seconds to breathe. Every upgrade feels personal, because it’s tied to the way you play. Some Raiders lean into long-range sniping, others want to smash through the front line, and a few focus on keeping the team alive. The Workbench lets you build toward any of those roles without locking you into one.The best part is how every scrap you pick up starts to feel valuable. You stop seeing junk and start seeing possibilities. That pile of broken circuits might be the start of a faster hook. Those twisted bits of plating could turn into extra armour. The grind never feels empty, because every mission pushes your kit forward. Over time, you go from scraping by to feeling like you can take the fight to ARC on your own terms. And when you finally piece together that dream setup—maybe with the help of a rare find or a quick buy ARC Raiders BluePrint —you know you’ve earned it.

Read More...

Alright, so jumping into Black Ops 7 this year feels like the devs really wanted to give us a playground that mixes old favourites with some wild new tech. You’ll see stuff that feels familiar, but also guns that make you rethink how you move around the map. Whether you’re the type who rushes in or someone who hangs back picking shots, there’s a solid spread here. And yeah, the early meta’s already looking pretty spicy. If you’re trying to get ahead of the curve, CoD BO7 Boosting might be worth checking out just to keep pace with the competition.Let’s kick off with the assault rifles. The AV-90 is the dependable one – steady recoil, decent range, and no real weak spots. It’s not flashy, but it won’t let you down. Then there’s the Manticore, which is basically a powerhouse. Hits hard, drops enemies fast, but man, the recoil can be brutal. If you’ve got good trigger discipline and can keep it under control, you’ll tear through lobbies. It’s one of those high-skill weapons where the payoff’s huge if you put in the time.SMGs are all about speed. The Vector-X is back and still shreds in close quarters – blink and you’re gone. Past 15 metres though, you’ll start losing fights fast. The newcomer, Stinger P9, feels slick. Bullpup design, quick ADS, easy to handle – perfect for flanking or hitting enemies before they know you’re there. It’s the kind of gun that makes you want to stay on the move, ducking in and out of cover.Snipers? They’re looking deadly this time. The Obsidian .50 is the classic heavy hitter – slow, chunky, but one upper torso hit and it’s game over for your target. If you’re into quickscoping, the Stalker S-1 will be your go-to. Lighter, faster, and lets you play aggressive without feeling bogged down. It’s not as forgiving, so you’ve gotta be sharp, but landing those quick headshots is ridiculously satisfying. You’ll see plenty of players running it just for the thrill.Outside that, LMGs like the Ares-MG are perfect for locking down lanes with constant fire, and shotguns such as the Breacher 12 make short work of anyone hiding indoors. The real depth kicks in when you start messing with the Gunsmith – swapping barrels, stocks, optics, whatever fits your style. There’s a ton of room to experiment, and with the meta still fresh, now’s the time to try weird builds before everyone settles on the “best” setups. If you want to keep your edge while figuring it all out, cheap CoD BO7 Boosting could be a solid shortcut.

Read More...

If you have been trying to fill out your operator lineup in Black Ops 7, you will know it can be a bit of a slog. The good news is there is more than one way to go about it, and you do not have to stick to just one route. Some folks just grind out matches, others dip into the campaign, and some go straight for seasonal rewards. Honestly, it depends on how much time you have and what you enjoy. For me, mixing it up keeps things fresh. And if you ever want a shortcut, there is always something like CoD BO7 Bot Lobby to speed things along.One of the simplest ways is just playing multiplayer and knocking out challenges tied to specific operators. You will see stuff like “get a set number of kills with a certain weapon” or “pull off a few finishing moves.” Some of these you will complete without even thinking about it, others might push you out of your comfort zone. The trick is to pick one operator’s challenge, focus on it for a few games, and tick it off faster. You will be surprised how quickly they start unlocking when you are deliberate about it.Do not overlook the campaign mode. Treyarch often links a handful of operators to story progress. Beating certain missions or finishing the campaign can drop a couple of solid characters straight into your multiplayer roster. It is a nice break from competitive lobbies, and you get the bonus of experiencing the narrative while adding to your collection. Sometimes these are the more iconic faces too, so it is worth the time.Seasonal Battle Passes are another steady stream of new operators. Each pass usually has at least one you can unlock for free just by levelling up, and if you grab the premium version, you get the headline operator instantly. Another one might be sitting at the final tier, giving you something to aim for. Even if you are not spending cash, the free track can still net you someone new each season, so it is worth keeping an eye on.Of course, if patience is not your thing, the in-game store is the quick fix. Operators often show up in bundles alongside weapon blueprints and cosmetic gear. Buy it with CoD Points and they are yours instantly. It is not the cheapest route, but if you spot a character you really want, it is the fastest way to lock them in. Whether you are grinding, mixing modes, or going straight for instant unlocks, there is always a way to grow your roster — and if you want the most direct route, you can check out CoD BO7 Bot Lobbies for sale to skip the grind altogether.

Read More...

If you’ve ever had that itch to just stand back, point at the battlefield, and let your crew tear everything apart, this Wolf Golem Necro setup is right up your alley. It’s that sweet spot between feeling in control and not having to mash buttons every second. You’ve got a hulking Blood Golem up front, soaking hits like a champ, and a pack of wolves snapping at anything that moves. Your role? Keep the fight flowing, line up the kills, and enjoy the show. This is the kind of build that makes you feel like the general, not the grunt. And yeah, getting the right Diablo 4 Items to boost your minions is a big part of making it sing.The Blood Golem’s the heart of it all. He’s not just there to take punches – his active skill drains life from everything nearby, which means he’s healing himself while blasting the enemy. That’s a big deal when you’re wading into tougher fights. The wolves aren’t just for show either; they hit hard now, so your frontline is basically a living wall of damage. You pull enemies together with Corpse Tendrils, setting them up for the Golem’s smash or the wolves’ bite. And when things get hairy, Army of the Dead drops in like a nuke, clearing space fast.Gear-wise, it’s all about making your minions meaner and tougher. The Aspect of Reanimation is a gem – the longer your skeletons stick around, the harder they hit. Hardened Bones Aspect is another must, cutting down the damage they take so they don’t get wiped by big AoE blasts. The Sacrilegious Soul Ring is almost unfair; it auto-casts Corpse Explosion and Tendrils, so you can focus on moving your army and timing your big cooldowns instead of juggling buttons. It smooths out the whole playstyle and keeps the action rolling.Book of the Dead choices give the build its edge. Sacrificing Skirmishers for that personal crit boost is worth it – you’ll notice the extra punch. Cold Mages stay in the mix because they make enemies Vulnerable and help keep your Essence flowing. And the Blood Golem? No question – he’s the anchor that keeps the whole thing together. The loop is simple but never gets old: pull enemies in, drop the Golem’s active right in the middle, watch the wolves tear through, and mop up with whatever’s left. It nails that minion-master vibe and keeps you grinning from start to finish, especially once you’ve stacked the right d4 uniques .

Read More...

Let’s be honest, if you manage to snag the Anvil rocket launcher, you’re basically holding the keys to the match. It’s not just the raw damage – the splash radius is huge, and suddenly whole squads are scrambling for cover. It’s brilliant for breaking entrenched positions or punishing anyone silly enough to bunch up. The trick, though, is not to just fire and hope. You’ve gotta lead your shots, especially if they’re sprinting. Aim low – at their feet or the cover they’re hugging – and you’ll get the most out of that brutal blast. Trust me, if you’ve got the Anvil, your odds of a clean run skyrocket, and it’s worth every bit of grind for ARC Raiders Coins .Now, while the Anvil’s in a league of its own, there are other weapons that can carry you to victory. The Sting sniper rifle is my go-to for long-range work. It’s got minimal bullet drop, so even if you’re not the best shot, you’ll land more hits than you expect. A clean headshot? Game over for most players. On the flip side, if the fight’s up close, the Shredder SMG is just nasty – melts through armour before your opponent even realises what’s happening. Pairing a Sting with a Shredder gives you a loadout that can deal with pretty much anything the game throws at you.Of course, you’re not always going to find those S-tier beauties. That’s where the dependable A-tier gear comes in. The Bastion assault rifle is the definition of solid – predictable recoil, decent damage, works well at most ranges. It’s the gun you can pick up and instantly feel comfortable with. And if you’re pushing through tight interiors, the Hammer shotgun is a monster. One solid hit and you’re walking away from the fight while they’re still wondering what happened. These might not be flashy, but they’ll win you fights if you know how to use them.Gear’s only half the story, though. Knowing when and how to fight is what separates the winners from the rest. Take the Kinetic Pulse ARC ability – loads of players blow it the second bullets start flying. Big mistake. Save it for the right moment. Shotgun rusher? Hit Pulse, knock them back, buy yourself space. Need to get a teammate up? Use it to push enemies away and make a safe revive. And seriously, don’t get caught standing in the open. Move from cover to cover, listen for footsteps, and try to dictate the fight. In the end, smart positioning and timing will win you more matches than raw aim – and if you’re looking to push your game even further, it’s worth thinking about how to buy Raider Tokens .

Read More...

So, you have picked up the SOR-556 MK2 in Battlefield 6 and maybe you are wondering why people talk about it so much. It is not the kind of rifle that will save you in a frantic close-range fight, and you will not outgun a fast SMG in tight corners. That is not what it is built for. This thing is for players who like to hold an angle, pick their shots, and make them count. Think of it like a precision tool, perfect for locking down mid-to-long range lines of sight. If you have a steady aim and a bit of patience, it can be brutal. I first realised its potential while in a Battlefield 6 Bot Lobby , and it became clear that this rifle is all about control and placement.When it comes to setting it up, forget about trying to make it a run-and-gun weapon. You will just end up frustrated. The best way to get the most out of it is to lean into its strengths. For optics, a 3.0x to 4.0x magnification works perfectly. The Specter Hybrid 1-4x is a great pick because you can switch between zoom levels depending on the fight. For the barrel, the Z-50 Long Barrel is a must. Sure, it slows down your aim-down-sight speed a touch, but the boost to bullet velocity is worth it. At most ranges, you barely have to lead your shots at all.Underbarrel choice is simple – go with the FTAC Ripper 56. It gives you excellent aiming stability, which is far more important here than recoil control, because the SOR-556 MK2 barely kicks anyway. Stability means you can land those second and third shots without losing your target. For ammo, high velocity 5.56 rounds are the way to go. Combined with the long barrel, your bullets will feel almost instant, giving enemies very little time to react. This setup turns the rifle into a laser beam at range.Using it well is all about playing smart. You are not the one charging into a building first – you are the one covering the approach. Find a good spot with a clear view of where enemies like to move. Let your team push forward while you pick off anyone who gets careless. Do not spam the trigger. Tap out two or three shots, pause just enough for the sight to settle, then fire again. This rhythm keeps your accuracy razor-sharp. Aim for the head whenever you can – the rifle’s low recoil and fast bullet speed make headshots much easier than with most guns.Once you get the hang of it, you will find yourself anchoring your team’s defence, shutting down lanes, and frustrating snipers who try to challenge you. There is a certain satisfaction in holding that perfect angle and knowing the other side is wary of peeking. And if you ever want a safe place to practise this style, a cheap Bf6 bot lobby can be a great way to sharpen your aim and get comfortable with the rifle’s rhythm.

Read More...

Some folks love the SOR-556 MK2, others can’t seem to make it work. And honestly, I get why. This rifle isn’t built for mindless rushing. It’s more like a precision tool in a game full of blunt instruments. If you play it right, you’ll make enemies think twice before poking their heads out. You’re not the first one through the door anymore – you’re the one holding the angle, locking down lanes, and quietly shaping the fight. If you’ve ever thought about taking that more methodical role, this is your gun. And yeah, pairing it with something like Battlefield 6 Boosting can really help you get into that mindset faster.When it comes to setup, forget all the hip-fire and sprint-to-fire nonsense. You’re building for control and accuracy here. For optics, a mid-range scope is the sweet spot. The VLK 4.0x Optic is a personal favourite – clear sight picture, no messy reticle clutter, and enough zoom to pick out targets without the recoil shaking your screen to bits. Go much higher than 6x and you’ll start fighting your own gun instead of the enemy. Keep it practical.The barrel choice is where a lot of people mess up. The Tempus Marksman 22" is the one you want. Sure, your aim-down-sight speed takes a slight hit, but the trade-off is worth it. Faster bullet velocity, better recoil control – it just feels snappier when you’re tracking a moving target. Underneath, skip the usual foregrip and try the Bipod. Sounds weird, but once you’re prone or mounted on a ledge, the recoil practically disappears. It turns the MK2 into a stationary laser, perfect for locking down a lane.Now, how you use it matters just as much as the build. Think ahead. You want spots with good sightlines and solid cover. A rooftop works, but a second-storey window can be even better – harder to spot you, easier to duck out if things get hot. And don’t camp in one place forever. Two or three kills, then move. If they know where you are, you’re already in trouble. The best marksmen play a game of hide-and-seek, always one step ahead.The firing rhythm is where the MK2 really separates the good players from the rest. Don’t just hold the trigger down – you’ll waste ammo and lose accuracy. It’s more of a steady pop… pop… pop. Let the recoil settle between shots, aim for the upper chest, and you’ll start chaining kills before the enemy even figures out your position. Once you get that timing down, the SOR-556 MK2 stops being just another rifle – it becomes your signature. If you want to speed up that learning curve, u4gm Battlefield 6 Boosting can give you the reps you need without the grind.

Read More...

Ever wanted to feel like an unstoppable force stomping through Wraeclast? Not the flashy spellcaster kind or the nimble archer — I mean the kind of brute who makes the ground shake with every swing. The Titan Warrior is all about that raw, satisfying impact. You line up the hit, wind up, and when it lands, the whole screen just explodes in chaos. It is not quick, and you are not darting around like a rogue, but the trade-off is worth it. With a massive two-hander in your grip and enough muscle to make the numbers on your weapon look ridiculous, you turn mobs into a smear before they can even touch you. And yeah, stacking stun so hard that anything still alive is too dazed to fight back is the cherry on top. If you are looking to farm or trade efficiently, having a stash of PoE 2 Currency handy makes gearing up for this style way smoother.The whole approach leans into Path of Exile 2’s heavier melee feel. You are not spinning endlessly or spamming tiny hits. You are a walking avalanche. The weapon of choice? A giant mace or axe with absurd base damage. You pick your spot, commit to the swing, and let the slam do the talking. It is about timing and positioning — too early and you whiff, too late and you get swarmed. But when you nail it, the shockwave clears everything in a cone ahead of you, leaving only dust and loot behind. The stun chance is not just for show either; it is your main crowd control. No need for fancy traps or kiting — just hit so hard they cannot hit back.Your core attack is a big, sweeping slam. Imagine a Ground Slam or Sunder that feels heavier, slower, but way more devastating. The animation roots you for a moment, then the earth cracks open under your weapon. Link it with supports that pump up physical damage, widen the area, and push stun duration through the roof. Every hit should feel like it could drop a mountain. There is a rhythm to it — slam, reposition, slam again — and once you get into that flow, it is addictive. Packs charging at you just stop mid-run, frozen for a heartbeat, then collapse.Path of Exile 2’s weapon swap is a big win for this setup. You can keep your main two-hander for clearing, then flick to a one-hander and shield for bosses or tough situations. No more awkward moments where your slow slam build feels useless against a single target. The new support gem system also helps you focus on that “one big hit” style without feeling dead in the water between swings. It is a playstyle that fits perfectly with the game’s more visceral combat direction. If you want that feeling of raw, earth-shattering power every time you attack, stacking the right gear and maybe grabbing some PoE 2 Currency for sale can make the dream come alive fast.

Read More...

One of the main focuses of Diablo 4 Season 10 has been improving class balance, ensuring that no single class dominates or falls behind. To achieve this, the developers have adjusted abilities and mechanics across all classes to create a fair and engaging gameplay experience Diablo 4 items .

Barbarian
Known for their raw strength and durability, Barbarians have received tweaks in Season 10 to maintain their status as a formidable force on the battlefield. These adjustments fine-tune their damage output, survivability, and overall effectiveness in both solo and group play.

Sorceress
The Sorceress relies on powerful ranged spells to take down enemies. To balance her abilities, developers have made adjustments to spell damage, cooldowns, and resource management, ensuring she remains both powerful and fair compared to other classes.

For players looking to quickly enhance their builds or access top-tier gear, Season 10 also provides opportunities to buy Diablo 4 gold, making it easier to acquire the items needed to maximize your class’s potential.

Druid
The Druid harnesses the power of nature to control the battlefield. In Season 10, the developers have focused on improving the synergy between the Druid's different forms and abilities. This means that players can expect a more fluid and dynamic gameplay experience when playing as a Druid.

Necromancer
The Necromancer commands an army of the undead to do their bidding. To ensure that the Necromancer remains a viable option in Season 10, the developers have made adjustments to.

Bug Fixes
In addition to class balance tweaks, Diablo 4 Season 10 also includes a number of bug fixes to address issues reported by players. These fixes range from minor visual glitches to more serious gameplay issues that could impact the overall experience. 

Some of the key bug fixes in Diablo 4 Season 10 include:
Fixed a crash that occurred when using a specific ability.
Resolved an issue preventing players from progressing past certain quests.
Addressed a bug where loot failed to drop from some enemies.
Fixed a visual glitch that caused characters to appear distorted in certain areas.
By resolving these issues, the developers have created a smoother and more enjoyable gameplay experience for all players.

In addition to these fixes, Season 10 brings class balance tweaks that enhance both the Barbarian’s raw strength and the Sorceress’s magical prowess. Whether you enjoy powerful melee attacks or devastating spells diablo 4 loot , there’s something for everyone. Players can also enhance their progression by acquiring top-tier Diablo 4 items, making it easier to maximize the potential of their favorite classes. 

Read More...

In this mode, players can advance through challenges at a more relaxed pace, making it easier to complete objectives and acquire rewards.Many newcomers even use Bf6 bot lobbies to practice without pressure Battlefield 6 Bot Lobby . The approach strikes a balance between experiencing the full depth of a Battlefield match while reducing the stress generally associated with competitive multiplayer gameplay.

Moreover, Accidental Breakthrough helps players accustom themselves with new maps and weapons alien in season 1. For beginners, experimenting with these new elements in a lower-pressure ambiance can advance acquirements and advance confidence. It additionally encourages added accidental players to appoint with melancholia content, ensuring that they can adore the bold after consistently activity outmatched by added accomplished opponents.

Gauntlet Mode
Alongside Accidental Breakthrough, Gauntlet has emerged as accession awful discussed accession in season 1. Alien aural the REDSEC mode, Gauntlet provides a added arduous and adrenaline-pumping experience. While Accidental Breakthrough focuses on accessibility, Gauntlet is congenital for players gluttonous fast-paced activity and college stakes.

In Gauntlet, players cross a alternation of ambitious objectives that analysis their shooting, tactical, and adaptation skills. The approach emphasizes precision, quick decision-making, and able teamwork. It additionally integrates some of the season’s new maps and weaponry, alms beginning cardinal possibilities. For aggressive players, Gauntlet presents an befalling to clarify their abilities and ascend the melancholia rankings, while still adequate the adventure that Battlefield 6 is accepted for.

Although Gauntlet is added arduous than Accidental Breakthrough, it is chargeless to all players aural REDSEC, authoritative it attainable to anyone absorbed in a added acute gameplay experience. 

Season 1 of Battlefield 6 demonstrates a bright accomplishment by the developers to alter the game’s multiplayer experience. By alms both Accidental Breakthrough and Gauntlet, the season caters to altered types of players, from newcomers gluttonous a airy access point to accomplished gamers appetite higher-intensity challenges.

The admittance of new maps and weapons ensures that players feel encouraged to explore and master them. Whether players are participating in the more relaxed Accidental Breakthrough mode or the adrenaline-fueled Gauntlet challenges, season 1 provides opportunities for everyone to enjoy the action in ways that suit their skill and play style. Some players even engage in Battlefield 6 Boosting to accelerate their progress or unlock specific rewards faster.

The addition of these modes underlines a broader trend in Battlefield 6: a focus on accessibility, variety, and melancholia agreeable that keeps players affianced over time. season 1 is added than aloof an update Battlefield 6 Boosting —it’s a footfall against authoritative Battlefield 6 a bold that welcomes newcomers while still arduous its adept community.

Read More...

In ARC Raiders, understanding the battlefield is just as important as mastering your weapons. One of the first things new players should focus on is familiarizing themselves with the map. Key locations such as spawn points, safe zones, resource hubs, and extraction points dictate how you move, fight, and survive. When you know the terrain, you can make split-second decisions: engage, retreat, or avoid conflict altogether. This “three-choice” mindset—fight, run, or hide—often determines whether you survive a raid or get eliminated prematurely. Additionally, knowing where to find ARC Raiders Coins , the in-game currency, can significantly impact your progression. 

Early-game progression heavily depends on completing missions and trading with vendors. The game offers various quests that reward you with resources, currency, or gear. Visiting merchants and selling unnecessary loot keeps your inventory optimized and provides extra credits for upgrading your equipment. Prioritizing tasks early accelerates your overall progression, giving you a stronger foundation for later, more challenging encounters. Balancing mission completion with smart trading ensures you’re not left underpowered in critical fights.

Extraction points and retreat timing are crucial elements in strategic play. Knowing when to pull back can save you from unnecessary losses. Sometimes, choosing a “safe extraction” over greedily chasing one more loot drop is the smarter move. During these moments, securing valuable ARC Raiders Items before extraction ensures that every raid contributes meaningfully to your progression, allowing you to upgrade your gear and strengthen your loadout for future encounters.

One advanced tactic involves using robot enemies as distractions or cover. In situations where other players are unknown or aggressive, you can lure or position robots to engage them. While your opponents are busy dealing with AI, you gain the opportunity to reposition, steal resources, or escape unnoticed. 

By combining map knowledge, efficient mission and vendor usage ARC Raiders Items , smart extraction timing, and creative use of AI as cover, new players can quickly transition from tentative beginners to confident, strategic operators. 

Read More...

The game also has a rich weapon system that mixes new and classic guns, with tons of customization options like attachments, skins, and progression perks. Players can tweak their loadouts to boost performance or just make them look cool, which encourages trying out different setups and keeps strategies fresh CoD BO7 Bot Lobby .

The weapon progression arrangement is added abundant than in antecedent titles, alms upgrades that affect both functionality and appearance. Players can alleviate specialized variants that accommodate altered benefits, auspicious analysis and adopting a faculty of buying over their arsenal. This abysmal customization band not alone adds array to action encounters but additionally increases the cardinal abyss of multiplayer battles, as weapon best and agreement can access assurance outcomes significantly.

Large-scale action is addition defining affection of BO7 multiplayer. Above acceptable 6v6 skirmishes, the bold introduces all-embracing 20v20 maps advised accurately for warfare-style battles. These massive arenas are absolute for players who adore chaotic, all-embracing encounters with assorted objectives, vehicles, and aggregation coordination. 

The way these maps are set up lets players come up with different strategies, from sneaky flanking and flexible assaults to holding key spots. Having such big multiplayer areas really appeals to fans of tactical warfare, giving an experience that’s more than your usual small-scale fights. As players get better in these environments, they’ll find plenty of chances to team up, swap weapons and loadouts, and take control of big parts of the battlefield.

All the intense environments, weapon customization, and wide-ranging maps combine to make BO7 multiplayer a seriously fun experience. Each part works together: the setting influences your battle plans, your weapon choices impact how well you do in those environments, and the map design shapes how fast and intense the fights get.

Call of Duty: Black Ops 7 promises a multiplayer acquaintance that is diverse, customizable, and expansive. Its acute ambiance maps advance players to amend accepted strategies, while the weapon customization arrangement allows for alone loadouts and progression. All-embracing 20v20 maps acquaint a akin of anarchy and teamwork rarely apparent in the series buy CoD BO7 Bot Lobby , accouterment both abyss and action for players of all accomplishment levels.

Read More...

I’ll hug any Amiga and keep her warm. Women are the more temperamental ones.

Is there a "Buy,Sell,Trade" forum? Thanks...

Marisa Giancarla is friends with Chuck Brand

Cookies user preferences
We use cookies to ensure you to get the best experience on our website. If you decline the use of cookies, this website may not function as expected.
Accept all
Decline all
Read more
Unknown
Unknown
Accept
Decline
Analytics
Tools used to analyze the data to measure the effectiveness of a website and to understand how it works.
Google Analytics
Accept
Decline
Functional
Tools used to give you more features when navigating on the website, this can include social sharing.
Stripe
Accept
Decline
Save